I use witch hazel as an astringent to clean my face and I feel bad every time I use a cotton ball just once, or one of those nice little pressed cotton pads and then chuck it in the trash. As I came down to the last one in my jar a week or so ago I thought there had to be a better way. I'd tried making Tawashi crocheted cotton flowers but they were just too rough and didn't hold the witch hazel very well. They do however, make excellent little face scrubbers in the shower. Sooo... what about microquilts? They're the same idea as the pressed cotton pads except much cuter AND they use up quilting scraps. You can chuck 'em in the laundry with the clothes to get them clean and reuse them. Perfect!
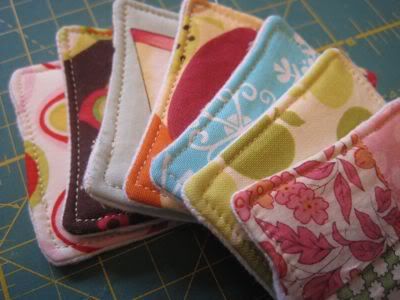
An array of cleaning pads
They are super simple to make.
1.) Cut out one 3" square of each of the following for one cleaning pad:
*Top fabric (cute quilting cotton)
*Batting (I used scrap warm and natural)
*Backing (I used white cotton flannel)
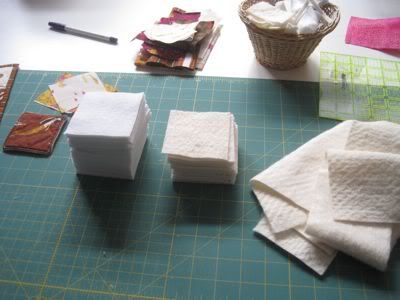
Since I was making a whole slew I cut out a few stacks of each.
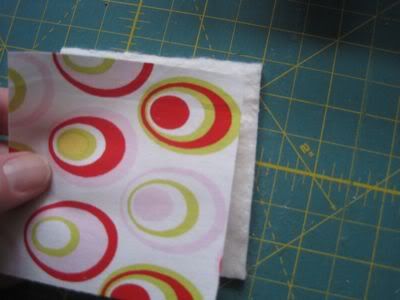
2.) Lay the fabrics down in this order:
Place the batting down on the table with the top fabric right side up, on top of it.
Place the backing fabric wrong side up on top of the batting and top fabric.
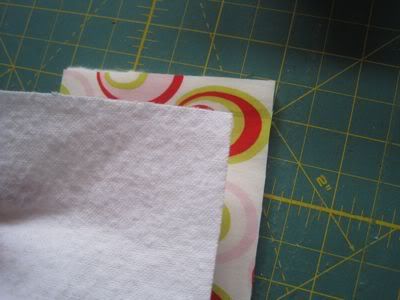
3.) Starting near a corner, stitch nearly all the way around using a 1/4" seam allowance. Cut the corners off so there is less bulk when you turn it. Be sure to leave a 1" to 2" gap so you can turn it inside out. Turn it so that the fabric comes through between the backing and the top fabric. (Think of the batting and the cute fabric as one).

4.) Make sure to poke the corners out so they're nice and square. Tuck in the unsewn bits and top stitch using 1/8" seam allowance all the way around to secure the edges.
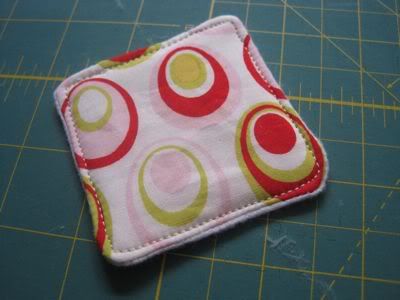
5.) Yup - that's it! You're done. Go wash your face. ^^
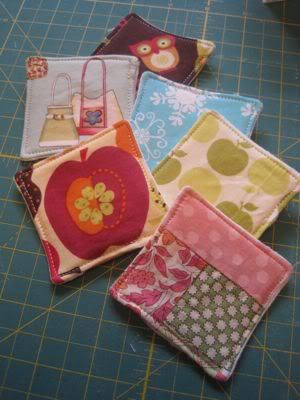
Remember you can even use bits of old quilt blocks you have laying around, see the bottom right pink and green one - it used to be a bento block. Anything works really.
6 comments:
What a good idea!
Great, great idea! And a set of these with your favorite toner/homemade tonic would be such a unique gift! Great idea. You rock. Why must you live across the country from me?! Want to have coffee and hang out in your sewing room and your sexy raised gardening beds...
pretty genius! I love this idea... I never but never make crafty items, they all seem so darn hard and fussy. I'm gonna actually try this.. thanks for sharing..
Thanks guys! I'll have to say that I've seen similar but usually with serged edges which IMHO are a bit *meh*. Besides, who doesn't like micro quilting? ^^
Andie, you're always welcome to come visit!
Rachel, they're super easy, fast and fun... I usually make a few before I sit down to "real" sewing projects just so I have the satisfaction of having finished something... heehee.
I LOVE this idea! I hate throwing away the batting scraps I get when I trim a new batting down to the size of my quilt top. Those trimmed off strips would be perfect for this. Also, if you use fabrics that coordinate with your bathroom, how pretty would a supply of these quilty pads be in a glass jar on the bathroom counter?
I wonder if these little pads are too small for free motion quilting practice, which I really need to do (because I suck at it, and complaining doesn't seem to be improving my skill level)? Even if I just traced around a spool of thread and quilted around one drawn circle on each little face pad, by the time I was finished with all of them I would have gotten some good practice in. Hmmm... Thanks for the great idea!
I came up with something similar a while ago, but used fleece for the backing, no batting, and a scrap of cotton flannel for the top. I sew it as you would for making a rag quilt. It's quick, soft, and dries fast.
Post a Comment